
Mastering the Halo Braid: A Complete Fall-Ready Guide

What is a Halo Braid?
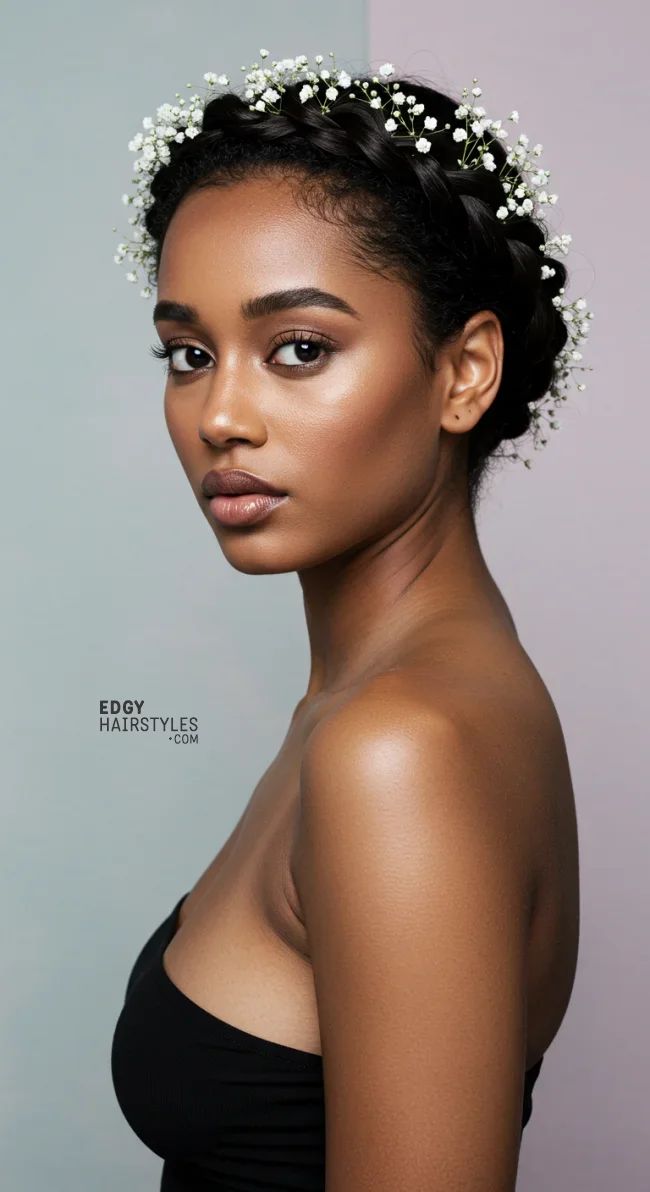
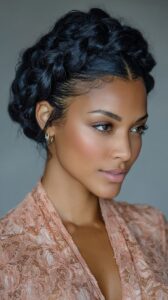
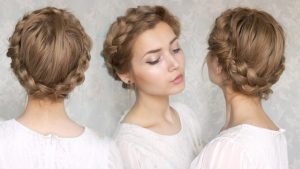
A halo braid is a beautiful plaited protective hairstyle created when a cornrow-style braid (or long Dutch braid) wraps around your head.
A great option for the holidays that is quick and easy and can be styled on naturally curly hair as well as all other hair types is the halo braid. The style creates a “halo effect,” hence the name halo braid. You can dress it up or down. You can also add some hair jewelry to give your hair some flair! You can never go wrong with a sleek halo braid.
 Gather Your Supplies
Before you jump into the styling process, make sure you have all the supplies you need. Doing this will make the process much quicker and easier to help you to achieve this flawless look in no time.
Hair Prep Supplies 
- Clarifying Shampoo
- Moisturizing Shampoo
- Moisturizing Conditioner
- Leave-In Conditioner, Oil, or other moisturizing products of your choice
Hair Stretching Supplies
- Hair Bands
- Blow dryer
Styling Supplies
- Edge control (for use with natural hair textures)
- Wide-tooth comb
- Rattail comb
- Denman Brush (for use with natural hair textures)
- Bobby Pins
- Edge Brush
Prepare Your Hair for a Halo Braid
Doing a protective style on unwashed, dry hair is not a good idea. It can lead to excessive pulling, snapped-off strands, pain, and a not-so-great result.
Hair prep includes cleaning your hair to get rid of product buildup, conditioning to nourish the strands, and moisturizing to ensure your hair stays happy and healthy while the style is in place.
Shampoo Your Hair
The first step to preparing your hair for a protective style is to wash it. First, wet your hair and apply a clarifying shampoo. This type of shampoo is best for removing product buildup from your hair.
When shampooing, be sure to focus on your roots, and let the shampoo work down to the ends on its own. Applying shampoo directly to your ends can cause tangles and unnecessary dryness.
Next, rinse out the clarifying shampoo and, if you have time, repeat the process with a moisturizing shampoo. This will replace some of the moisture that the clarifying shampoo may have taken away, prevent tangles, and ensure your hair is clean.
We recommend staying away from shampoos formulated with sulfates, drying alcohols, or parabens.
Condition Your Hair
Next, follow up with a moisturizing conditioner or deep conditioner. This time focus the product on your ends rather than your roots, as your ends need the most moisture. While your hair is coated in conditioner, detangle it with a wide-toothed comb or denman brush. If using a regular rinse-out conditioner, follow the instructions on the product label for the best results. When using a deep conditioner, allow the product to sit in your hair for 15 mins or more. You can even put a shower cap on to trap the heat from your scalp and boost the penetration of the moisturizing treatment. When rinsing out the conditioner, try to use cold water, as cooler temperatures will close up your hair’s cuticles and lock in the moisture.
Here are some great shampoos and conditioners for curly hair:
- Alikay Naturals Caribbean Coconut Milk Shampoo
- Mixed Roots Compounds Curl Cleansing Shampoo
- Palmer’s Moisture Boost Conditioner
- The Doux Ladies First Honey Shampoo
- Creme of Nature Argan Oil Creamy Hydration Co-Wash
Moisturize Your Hair
After you are done shampooing and conditioning your hair, be sure to use moisturizing products, including moisturizing cream, an oil, a leave-in conditioner, or all three! It is often best to apply these products while your hair is still soaking wet, as this ensures that your hair is getting as much moisture as possible. One popular method of moisturizing curly natural hair is the “LOC Method.”
- L – Start with a leave-in conditioner.
- O – Next, apply oil to lock in the moisture from the leave-in.
- C – Finish it off with a cream to seal the hair cuticle and maintain the moisture in your hair.

Here are some great moisturizers for curly hair:
- SheaMoisture Curl and Style Milk
- The Mane Choice H2O Hydration Therapy Intense Nourishing Leave In Conditioner
- Tropic Isle Living Jamaican Black Castor Oil
- Carol’s Daughter Black Vanilla Leave-in
Stretch Your Hair if Your Hair Is Textured
Stretching your hair can prevent knots and tangles and make it easier to do your halo braid. Multiple methods can be used to stretch your hair. You can try the banding method, blow drying your hair with Tension or braiding your hair to prepare your hair for the halo braid.
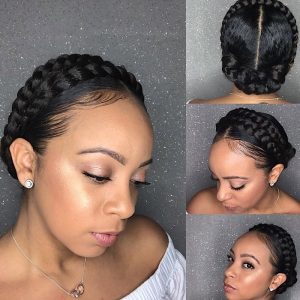
Instruction on creating your Halo Braid
 Read below the detailed steps on how to complete a halo braid:
- Use a styling gel or cream and an edge brush or toothbrush to lay your edges down.
- Part your hair at the crown of your head at the highest point. Comb the hair away from the crown of your head in a bowl shape all the way around.
- Part your hair from about 2 inches behind your ear to the crown of your head. This will be the beginning of your braid.
- Begin to braid, incorporating medium-sized sections of your own hair into the braid as you braid around your head. Because you are using your natural hair, the braid shouldn’t be too tight. This will allow you to achieve a fuller look with your braid.
- *Helpful Tip: Be sure to smooth out your hair as you braid. Doing this will prevent tangles and keep the braid looking neat.
- Continue braiding all the way around your head until all of your hair has been incorporated into the braid, and you’ve reached the ends of your hair.
- Tuck the end of the braid underneath your completed halo braid, either above or below it. Use bobby pins to secure it into place.
- Tuck away any flyaways or smooth them down with product, and you are all finished!

Dos and Don’ts of the Halo Braid
Refer to the below dos and don’ts of halo braid styling to help prevent mistakes and frustration in your styling process.
Do
-
Use as much moisturizing product as you feel your hair needs before and during the styling process to ensure the style will stay in place with little frizz or flyaways.
-
Be aware of how much tension is being applied as you braid. If the braid is too tight, this can cause damage to your scalp and hairline.
Don’t
-
Skip out on the steps to prepare your hair before this style. It can be tempting to jump right into styling, especially if you’re in a hurry, but taking the time to properly care for your hair beforehand will ensure that the style actually protects your hair rather than cause damage.
-
Use the entire length of your extension hair without trimming it. This will make the end of the braid very thick and difficult to tuck away.
-
Get your hair wet after styling. Your natural hair will curl up, causing frizz.